在Arduino平台上使用Platformio来使用SD卡,这里使用STM32开发板为例;
1. 建立工程
- 从模版建立工程
从仓库 https://github.com/makerinchina-iot/MonkeyPi-STM32G070-PIO_Arduino_example.git 下载模版;
- 添加SD库
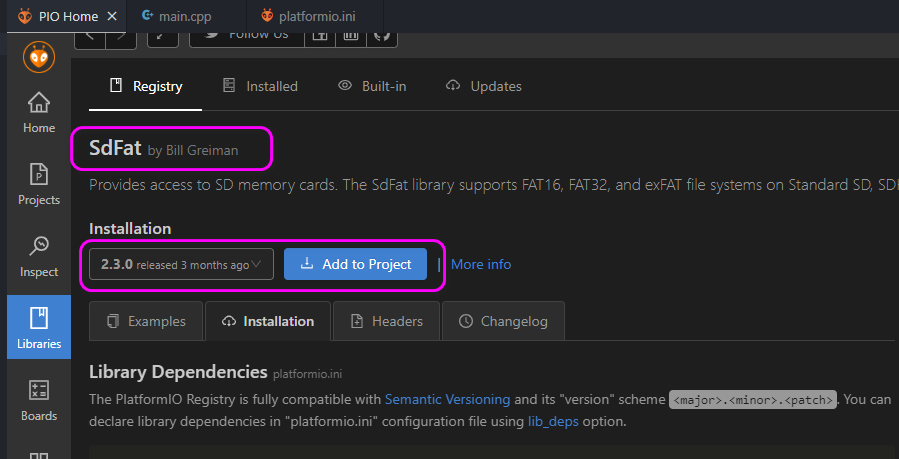
使用VSCode打开文件夹后,在Platformio的库中搜索sdfat并添加到工程:

或者直接在工程文件夹下 platformio.ini 中添加如下:
lib_deps = greiman/SdFat@^2.3.02. 打开SD卡示例
在上面打开的库的界面选择一个Example,这里选择ReadWrite示例:
/**
 * @file main.c
 * @author MonkeyPi (makerinchina.cn)
 * @version 0.01
 * @date 2024-03-31
 *
 * @copyright Copyright (c) 2024
 *
 * @brief
 */

#include <Arduino.h>

/*
  SD card read/write

 This example shows how to read and write data to and from an SD card file
 The circuit:
 * SD card attached to SPI bus as follows:
 ** MOSI - pin 11
 ** MISO - pin 12
 ** CLK - pin 13
 ** CS - pin 10

 created   Nov 2010
 by David A. Mellis
 modified 9 Apr 2012
 by Tom Igoe

 This example code is in the public domain.

 */

 #include <SPI.h>
 //#include <SD.h>
 #include "SdFat.h"
 SdFat SD;

 #define SD_CS_PIN SS
 File myFile;

 void setup() {

     pinMode(LED_BUILTIN, OUTPUT);

     // Open serial communications and wait for port to open:
     Serial.begin(115200);

     while (!Serial)
     {
         ; // wait for serial port to connect. Needed for native USB port only
     }


   Serial.print("Initializing SD card...");

   int cnts = 3;
   while (cnts--)
   {
    digitalWrite(LED_BUILTIN, HIGH);
    delay(500);
    digitalWrite(LED_BUILTIN, LOW);
    delay(500);
   }


   if (!SD.begin(SD_CS_PIN)) {
     Serial.println("initialization failed!");
     return;
   }
   Serial.println("initialization done.");

   #if 1

   // open the file. note that only one file can be open at a time,
   // so you have to close this one before opening another.
   myFile = SD.open("test.txt", FILE_WRITE);

   // if the file opened okay, write to it:
   if (myFile) {
     Serial.print("Writing to test.txt...");
     myFile.println("testing 1, 2, 3.");
     // close the file:
     myFile.close();
     Serial.println("done.");
   } else {
     // if the file didn't open, print an error:
     Serial.println("error opening test.txt");
   }

   // re-open the file for reading:
   myFile = SD.open("test.txt");
   if (myFile) {
     Serial.println("test.txt:");

     // read from the file until there's nothing else in it:
     while (myFile.available()) {
       Serial.write(myFile.read());
     }
     // close the file:
     myFile.close();
   } else {
     // if the file didn't open, print an error:
     Serial.println("error opening test.txt");
   }
   #endif
 }

 void loop() {
   // nothing happens after setup
 }
3. 硬件连接
这里使用的MonkeyPi-STM32G070RB开发板,因此需要按照Arduino引脚对应到STM32的SPI脚:
| STM32开发板 | SD卡模块 |
|---|---|
| 3.3 V | 3V3 |
| GND | GND |
| PA5 | SCK |
| PA7 | MOSI |
| PA6 | MISO |
| PB0 | CS |
4. 运行结果
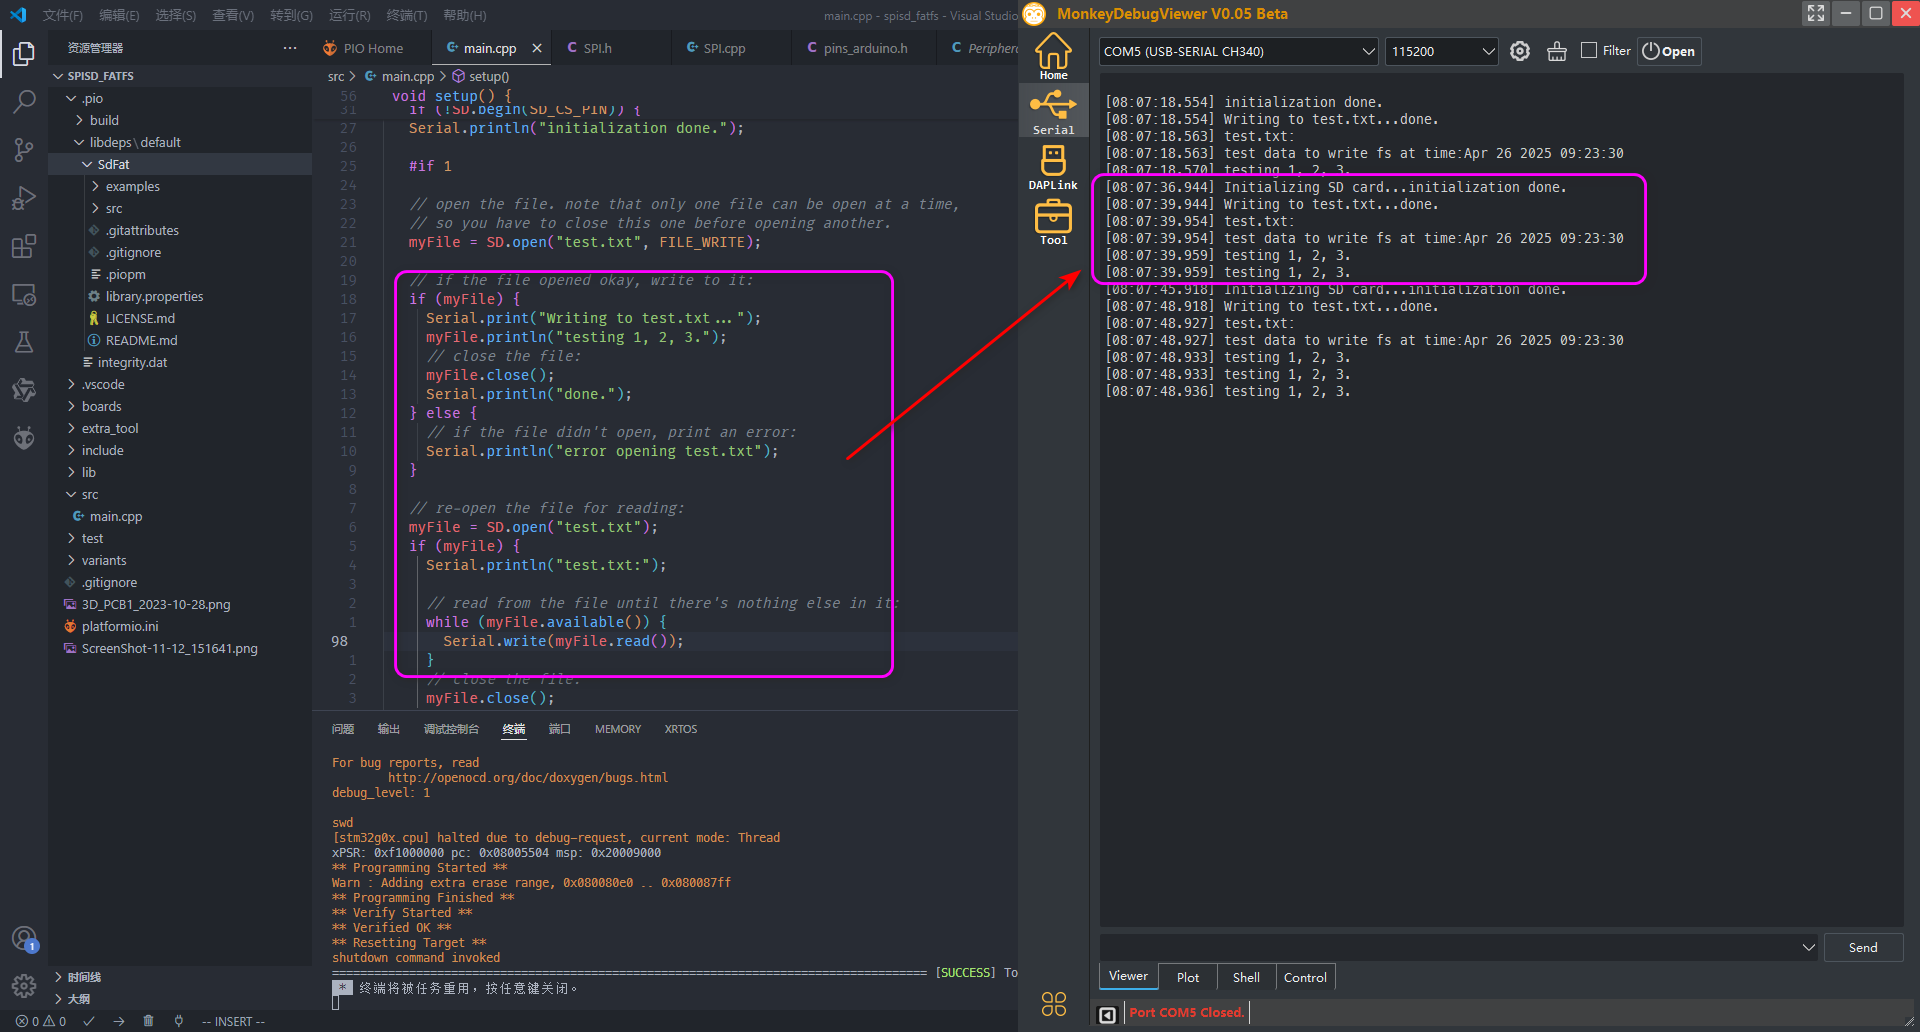
烧录到开发板后,可以看到串口输出日志:


评论