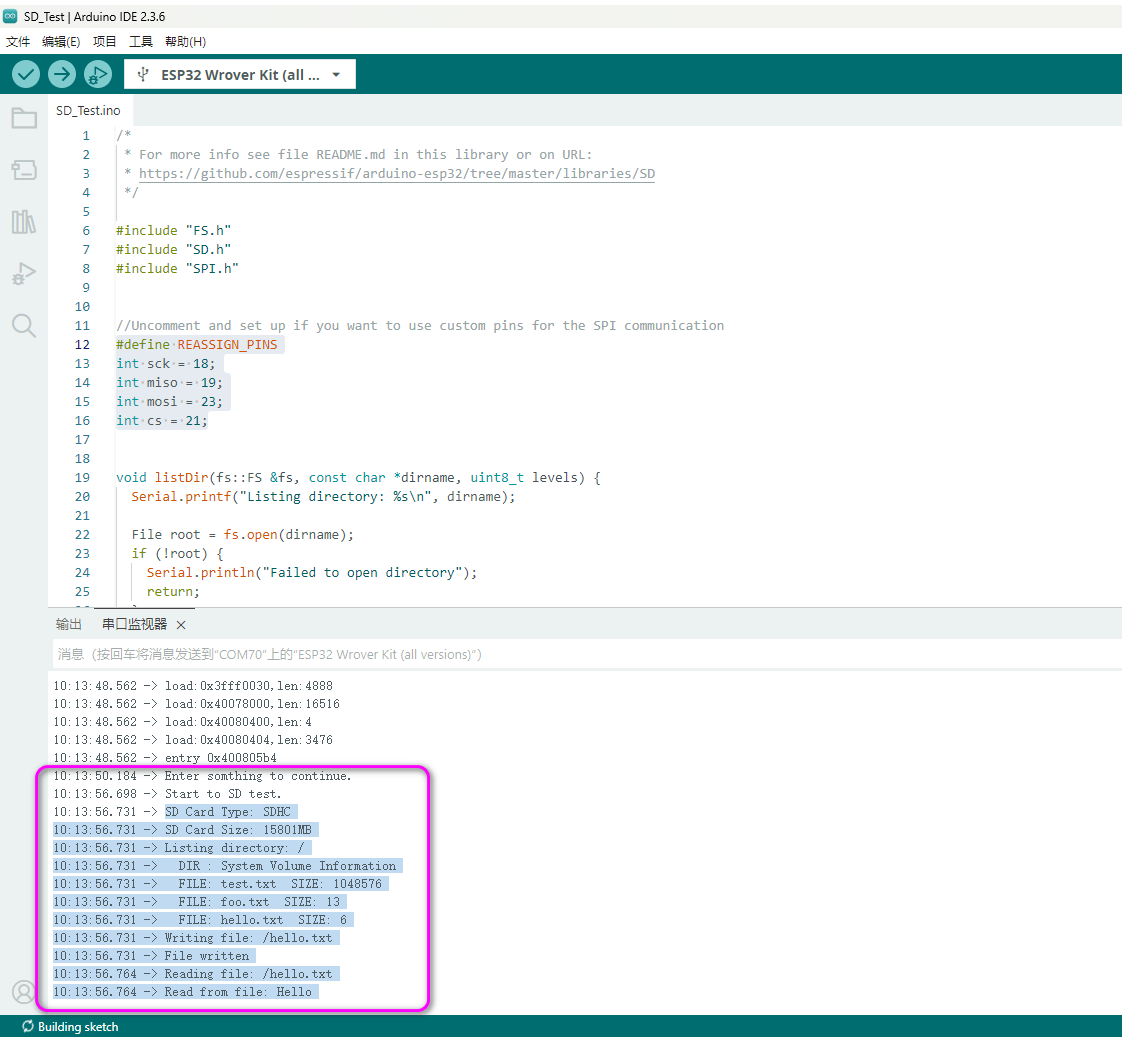
在Arduino平台上使用ESP32开发板使用SPI SD卡示例;
1. 建立项目
在Arduino-IDE中安装好ESP32开发板后,新建项目后写入如下测试代码:
/*
 * For more info see file README.md in this library or on URL:
 * https://github.com/espressif/arduino-esp32/tree/master/libraries/SD
 */

#include "FS.h"
#include "SD.h"
#include "SPI.h"


//Uncomment and set up if you want to use custom pins for the SPI communication
#define REASSIGN_PINS
int sck = 18;
int miso = 19;
int mosi = 23;
int cs = 21;


void listDir(fs::FS &fs, const char *dirname, uint8_t levels) {
  Serial.printf("Listing directory: %s\n", dirname);

  File root = fs.open(dirname);
  if (!root) {
    Serial.println("Failed to open directory");
    return;
  }
  if (!root.isDirectory()) {
    Serial.println("Not a directory");
    return;
  }

  File file = root.openNextFile();
  while (file) {
    if (file.isDirectory()) {
      Serial.print("  DIR : ");
      Serial.println(file.name());
      if (levels) {
        listDir(fs, file.path(), levels - 1);
      }
    } else {
      Serial.print("  FILE: ");
      Serial.print(file.name());
      Serial.print("  SIZE: ");
      Serial.println(file.size());
    }
    file = root.openNextFile();
  }
}

void readFile(fs::FS &fs, const char *path) {
  Serial.printf("Reading file: %s\n", path);

  File file = fs.open(path);
  if (!file) {
    Serial.println("Failed to open file for reading");
    return;
  }

  Serial.print("Read from file: ");
  while (file.available()) {
    Serial.write(file.read());
  }
  file.close();
}

void writeFile(fs::FS &fs, const char *path, const char *message) {
  Serial.printf("Writing file: %s\n", path);

  File file = fs.open(path, FILE_WRITE);
  if (!file) {
    Serial.println("Failed to open file for writing");
    return;
  }
  if (file.print(message)) {
    Serial.println("File written");
  } else {
    Serial.println("Write failed");
  }
  file.close();
}

void setup() {
  Serial.begin(115200);
  while (!Serial) {
    delay(10);
  }

  delay(1000);
  Serial.println("Enter somthing to continue.");

  while (true) {
    if (Serial.available() > 0) {
      break;
    }
  }
  Serial.println("Start to SD test.");

#ifdef REASSIGN_PINS
  SPI.begin(sck, miso, mosi, cs);
  SPI.setFrequency(4000000);
  if (!SD.begin(cs)) {
#else
  if (!SD.begin()) {
#endif
    Serial.println("Card Mount Failed");
    return;
  }
  uint8_t cardType = SD.cardType();

  if (cardType == CARD_NONE) {
    Serial.println("No SD card attached");
    return;
  }

  Serial.print("SD Card Type: ");
  if (cardType == CARD_MMC) {
    Serial.println("MMC");
  } else if (cardType == CARD_SD) {
    Serial.println("SDSC");
  } else if (cardType == CARD_SDHC) {
    Serial.println("SDHC");
  } else {
    Serial.println("UNKNOWN");
  }

  uint64_t cardSize = SD.cardSize() / (1024 * 1024);
  Serial.printf("SD Card Size: %lluMB\n", cardSize);

  listDir(SD, "/", 0);
  writeFile(SD, "/hello.txt", "Hello ");
  readFile(SD, "/hello.txt");
}

void loop() {}
2. 连接硬件
这里按照如下引脚连接:
| ESP32 | SD-Card |
|---|---|
| 3.3V | 3v3 |
| GND | GND |
| 19 | MISO |
| 23 | MOSI |
| 18 | SCK |
| 21 | CS |
在软件中也可以根据需要更改引脚:
#define REASSIGN_PINS
int sck = 18;
int miso = 19;
int mosi = 23;
int cs = 21;
3. 测试
Arduino-IDE中选择开发板串口,上传后打开串口监视器,输入一个任意字符后回车,即可看到如下Log,说明成功:


评论